Monny's Condo FAQ
Any doubt regarding the FAQ? Contact me on discord! "monsterwhore." Yes, the dot is part of it.
Carrd updated: March 2nd, 2026.
Head back to the main hub here.
How do I add stuff (maps, morphs, anims, etc) to my file?
You do this via 'importing' the content to your file. This is a very simple and easy process, and it shouldn't take much studio knowledge to handle properly.
For this, you'll obviously need two files. The file you want to extract stuff from, and the file where it'll be heading to.
First, in the file you want to extract from, open up the explorer.
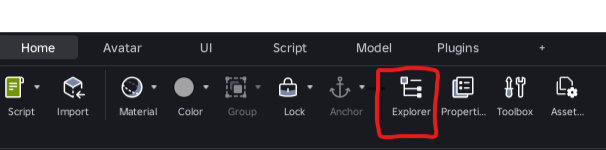
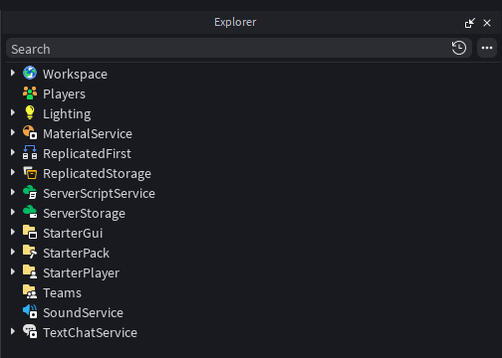
The explorer will pop up, and you should see all of the parts that make the file.
Now you have to find what exactly you want to extract. For my example, I'm using Goat v2.6, and in general, file location doesn't change much.For Morphs, look into ReplicatedStorage
-> Morphs.
For Maps, look into Workspace.
For Anims, look into ServerStorage -> Anims.
Here's where the FAQ will diverge due to the differences between exporting all of these (mainly in what you HAVE to export, but the process is the same).
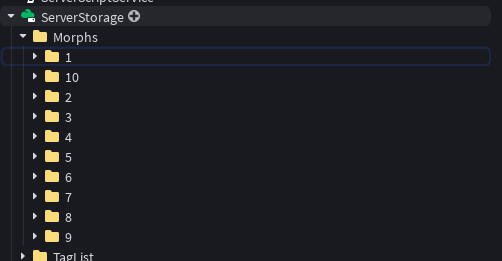
Exporting and Importing Morphs
When you open the 'Morphs' folder, you'll see a bunch of numbers. Each folder inside has all the morphs of a category. Find the morph you want to extract (You can also use the Explorer's Search function). It'll be as a folder or as a 'group' (three colored balls icon).
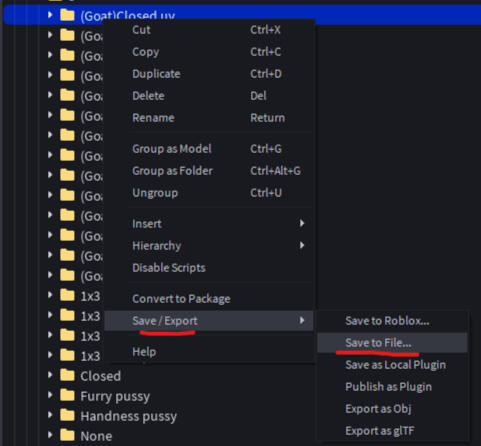
Once you find the morph you want, right-click the folder/group that has the morph name. Save/Export -> Save to File...
It'll allow you to save it as a .rbxm file.Once you do, you can head into the file where you want to add your morph.
Now that you're in your other file, you can import the morph.
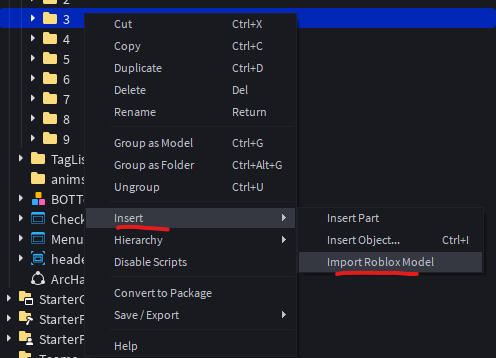
You do this by heading to the same folder the morph was on (So if for example, your morph was in the folder labeled "3", you head to the folder "3".)
Right-click the folder. Insert -> Import Roblox Model.
Select the .rbxm file you created earlier, and it'll be imported to the folder.
That's all you have to do to import a morph into your game.
P.S: You can skip the whole importing/exporting roblox models thing by just copy-pasting the morph from one file to another. Just make sure it's in the right folder. The same goes for any other thing you want to add to your file.
Exporting and Importing Maps
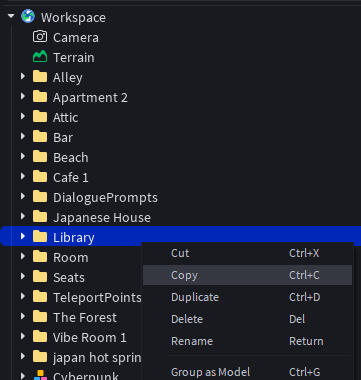
Opening the Workspace, you'll encounter the maps, either as a folder or as a group (if the person who made the file properly organized everything).
Following a similar process, you'll want to copy (Ctrl+C) the folder/group named after the map.
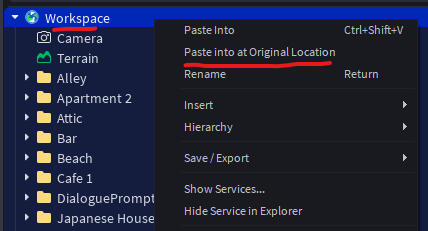
Now that your map is on your clipboard, you'll head to the file in which you want to add the map. Right-click the Workspace and Paste Into at Original Location.
This will paste the map into the file where it originally was on the other file.
You can select the map and press F to teleport to it and see if it collides with any other map in your file, in which case you'll have to move it.
Although the previous step added the map, you'll still be missing the teleport point and the teleport button for the map.
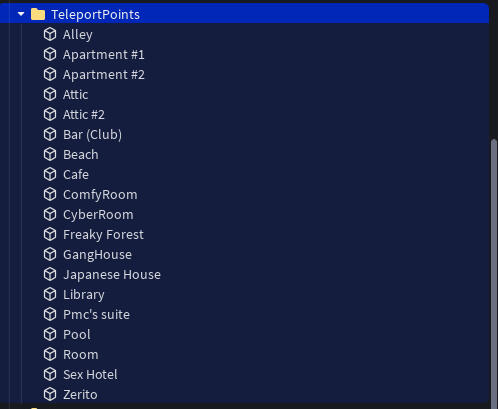
For the Teleport Point, you'll find it at Workspace -> TeleportPoints.
Copy the one named after your map and Paste Into at Original Location, in the same form as the previous step. If you moved the map, you'll also have to move the Teleport Point.
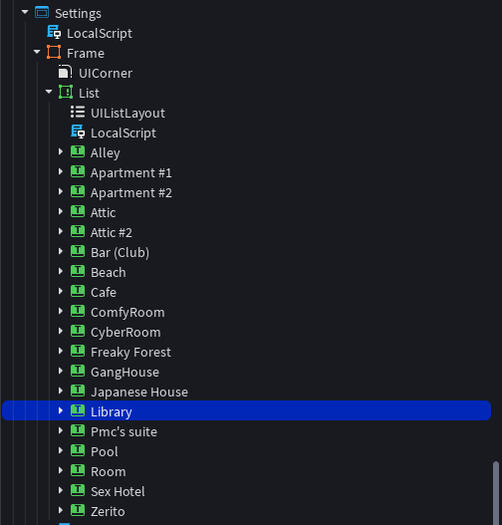
Now you'll only be missing the Teleport Button. The button is located at: StarterGui -> Settings -> Frame -> List.
You can also find it by looking up the same name as the TeleportPoint.
Copy the one that has the same name as your teleport point, and paste it into your other file to add the button to your in-game map list.
Something of importance is that both the Teleport Point and Teleport Button must have the same name in the Explorer.
You can change the name that shows in-game by looking at the Properties of the Teleport Button, in the Text properties.